on
Securing File Upload & Download with Using AWS S3 Bucket Presigned URLs and Python Flask
AWS S3 Buckets are a great way to store data for web applications, especially if the data files are big. But how can we grant access “public web application users” to upload files to “private S3 buckets” or download from there? How can we make sure our Bucket is safe and no one else sees the other files that they are not authorized to? In the following sections, we will learn secure ways to upload or download data from private S3 Buckets while creating a simple Python Flask web application.
Check out the example project on Github
- List of content:
- What is AWS S3 Bucket?
- Who can access the objects in AWS S3 Bucket?
- What is “Presigned URL”?
- Creating AWS S3 Bucket
- Creating AWS IAM user and limit the permissions
- Creating Python module for Bucket processes
- Creating Flask application
- Creating HTML page and AJAX endpoints
- How can we make accessing Bucket objects more secure?
What is AWS S3 Bucket?
An AWS S3 (Amazon Simple Storage Service) is an online object storage service and offers scalability, data availability, security, and performance. The “Buckets”, similar to file folders, can store objects (any type of data file) and their descriptive metadata.
A Bucket is used to store objects and the objects are defined by “Key” which simply means filename. If a bucket is public and someone wants to reach the object in it, https://s3.amazonaws.com/<bucket>/<key> can be used.

Who can access the objects in AWS S3 Bucket?
It depends on who you are allowing access to. Buckets can be created as Private and Public privileges. If it is created as Public, anyone can access the bucket and objects in it. Otherwise, if it is created as Private, only allowed users can access data and the users can be chosen via AWS IAM (Identity and Access Management). With IAM, user authorization can also be set, which is named “Policies”.
What is “Presigned URL”?
Presigned URLs can be used to upload, download or delete files by people who don’t have any access to the bucket. Presigned URLs grant temporary access to specific S3 objects and can only be created by users who have persistent access.
Using presigned URLs provides many important advantages:
- Bucket doesn’t need to be public, so private data (like users’ private files on a web application) can be stored securely in the same bucket.
- If a user, who doesn’t have access to the bucket, wants to upload or download data; they still can download or upload data via presigned URLs.
- Presigned URLs can be created at the server-side, so users cannot access sensitive data like API keys and cannot create URLs by themselves.
- Presigned URLs cannot be changed and are time-limited. So a user, who has the presigned URL of an object, cannot access another object by changing the signature of the URL and cannot use this URL forever.
Creating AWS S3 Bucket
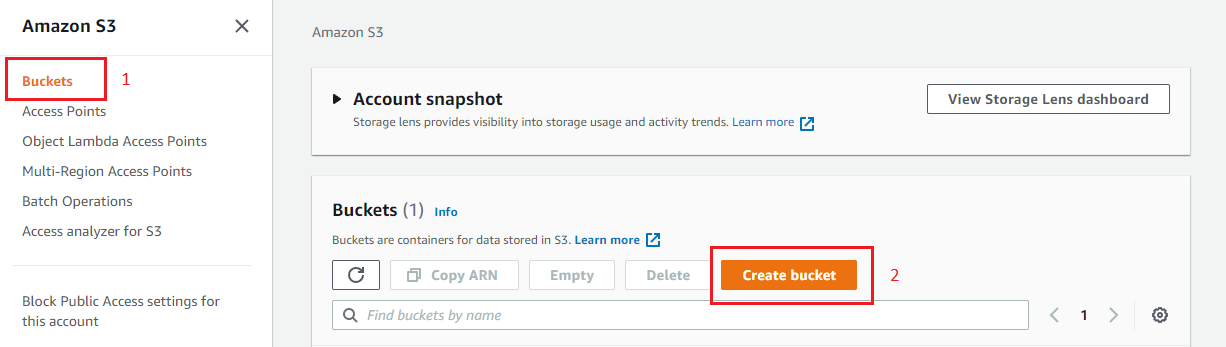
First, let’s create an AWS S3 Bucket. Navigate to AWS S3 Bucket and click the “Create bucket” button.
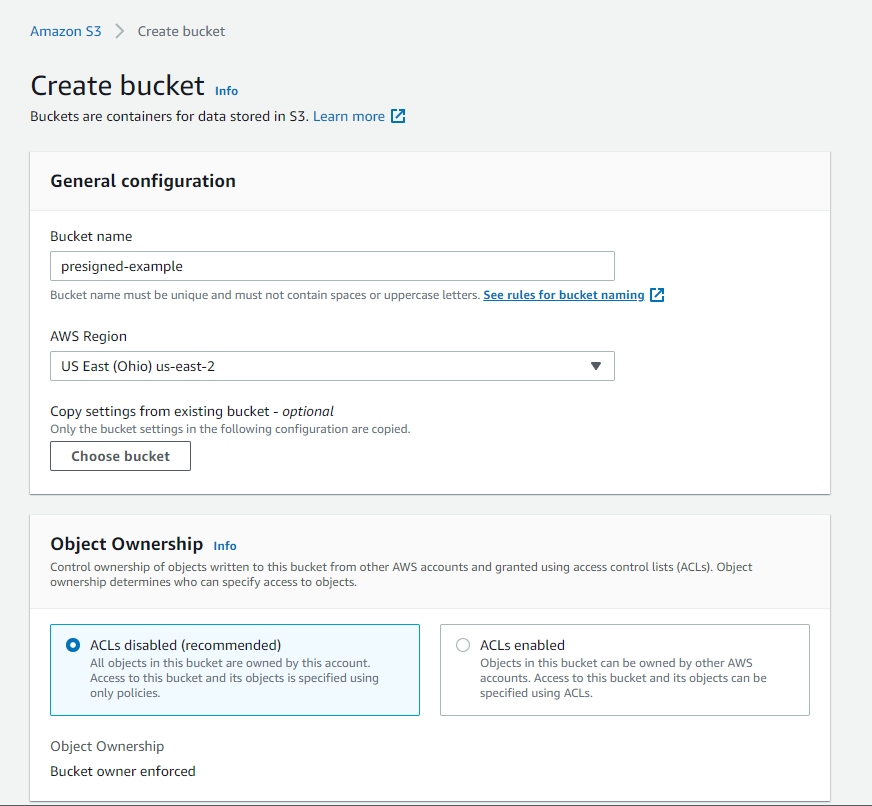
- Select bucket name, it must be unique (See the naming rules)
- Select AWS Region or leave it as default.
- Select ACLs disabled for Object Ownership.
- Make sure “Block all public access” is checked. This makes S3 Bucket private and only the users we grant access can reach the bucket. We will create access granted users later on AWS IAM.
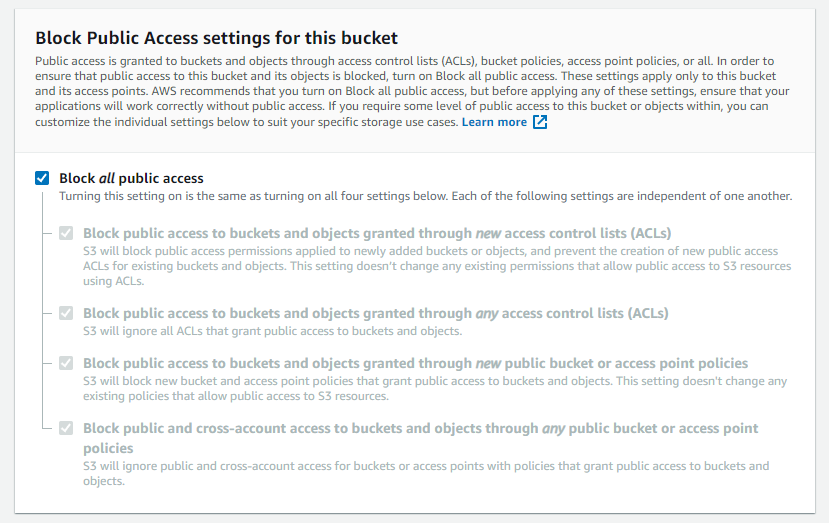
- Leave the other sections as default.
- Click the “Create Bucket” button.
Creating AWS IAM user and limit the permissions
The second thing we need to do is create an IAM user which will have limited access to the S3 Bucket we’ve been created. After creating a user, we will get access credentials (Access Key ID and Secret Access Key) and we will use that information in our web application.
Let’s create a policy to define permissions for the user we will create later.
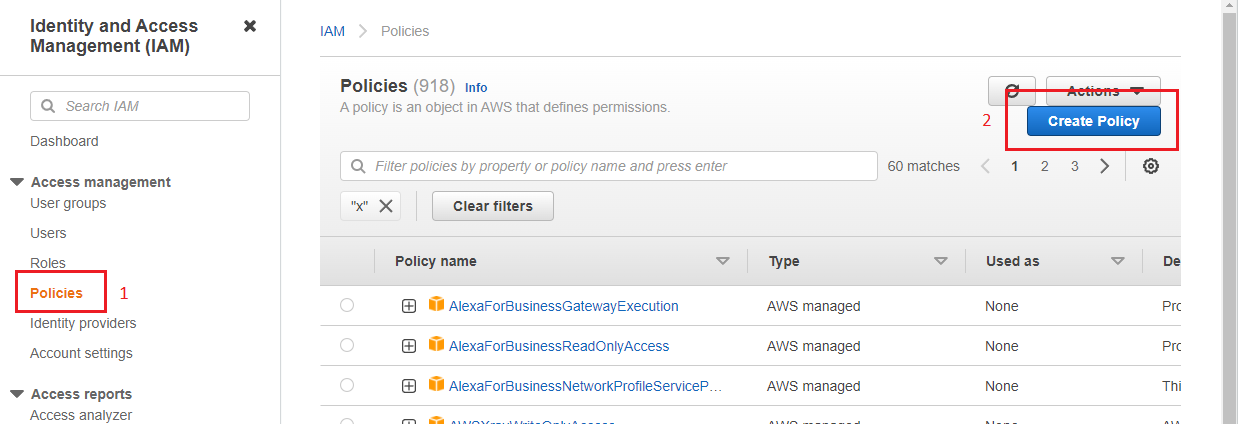
- Go to AWS IAM Homepage, select Policies, and click the “Create Policy” button.
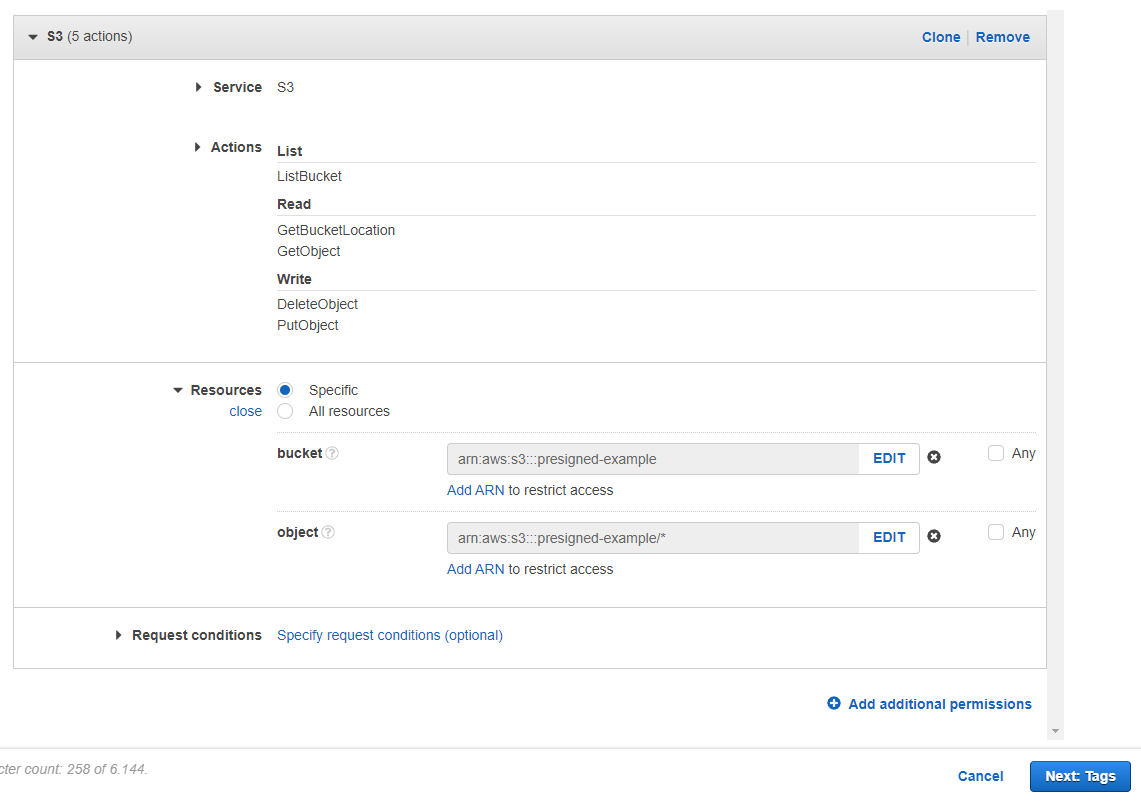
- Select “S3” in the “Service” section,
- Select the following permissions in the “Action” section. If you don’t need to have some of the permissions, you don’t have to select them.
- ListBucket : For listing files in Bucket
- GetBucketLocation : For listing files in Bucket
- GetObject : Download object permission
- DeleteObject : Delete object permission
- PutObject : Upload object permission
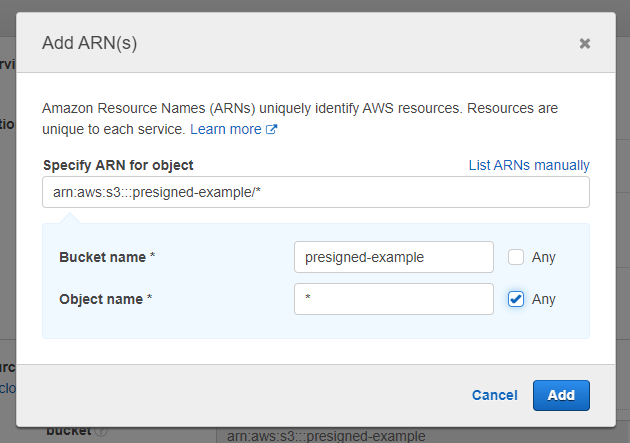
- In the “Resources” section, we should choose which S3 Bucket we grant permission to the user to use. We can choose all buckets, but we will limit the user to use only the bucket we’ve created before. So, write bucket name and choose “Any” for objects.
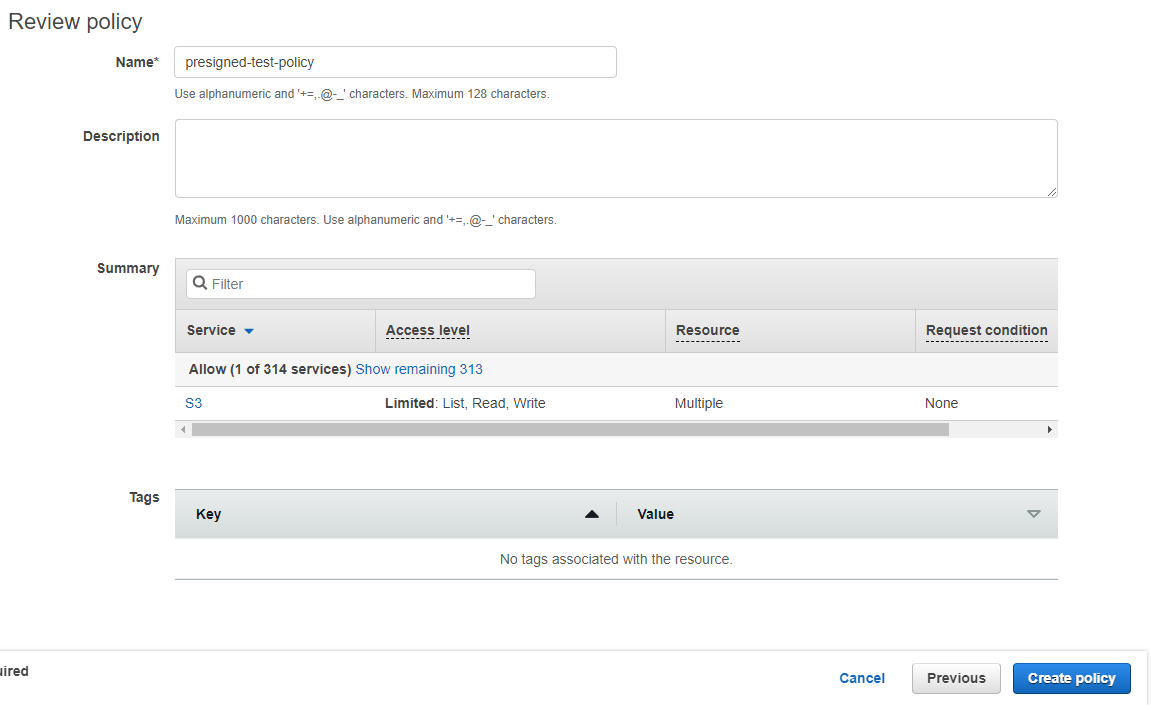
- Leave the other section as default and next to the other steps. Lastly, name the policy and click the “Create policy” button.
After creating a user policy, we can create a user who will manage Bucket processes.
- Go to AWS IAM Homepage, select “Users” and click the “Add users” button.
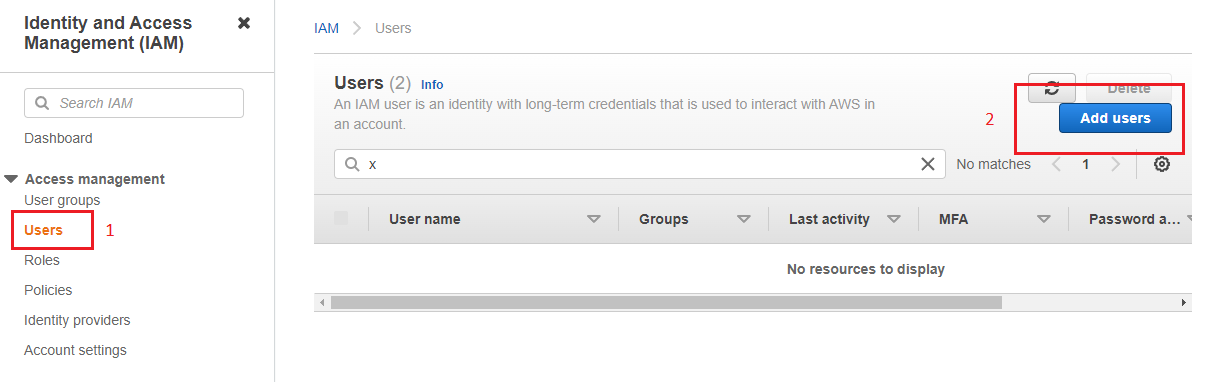
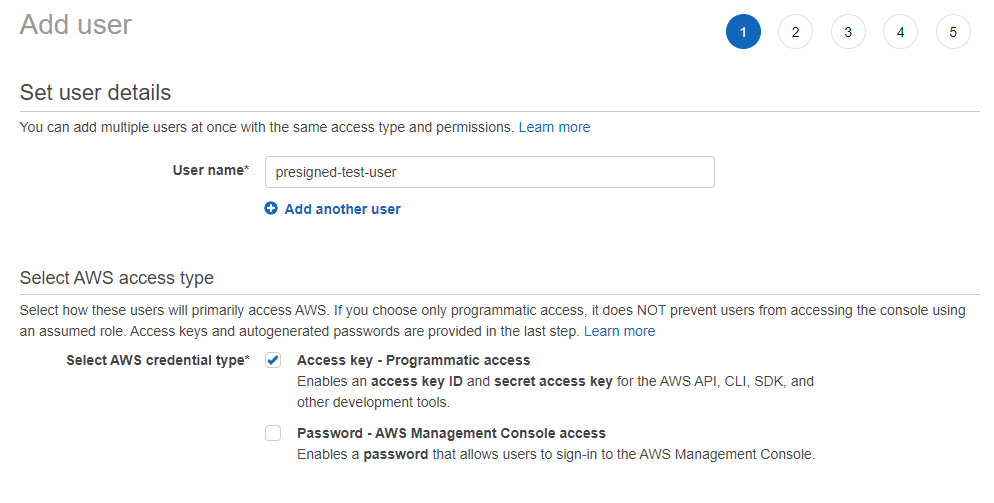
- Name the user and select “Access key - Programmatic access” and click the “Next” button.
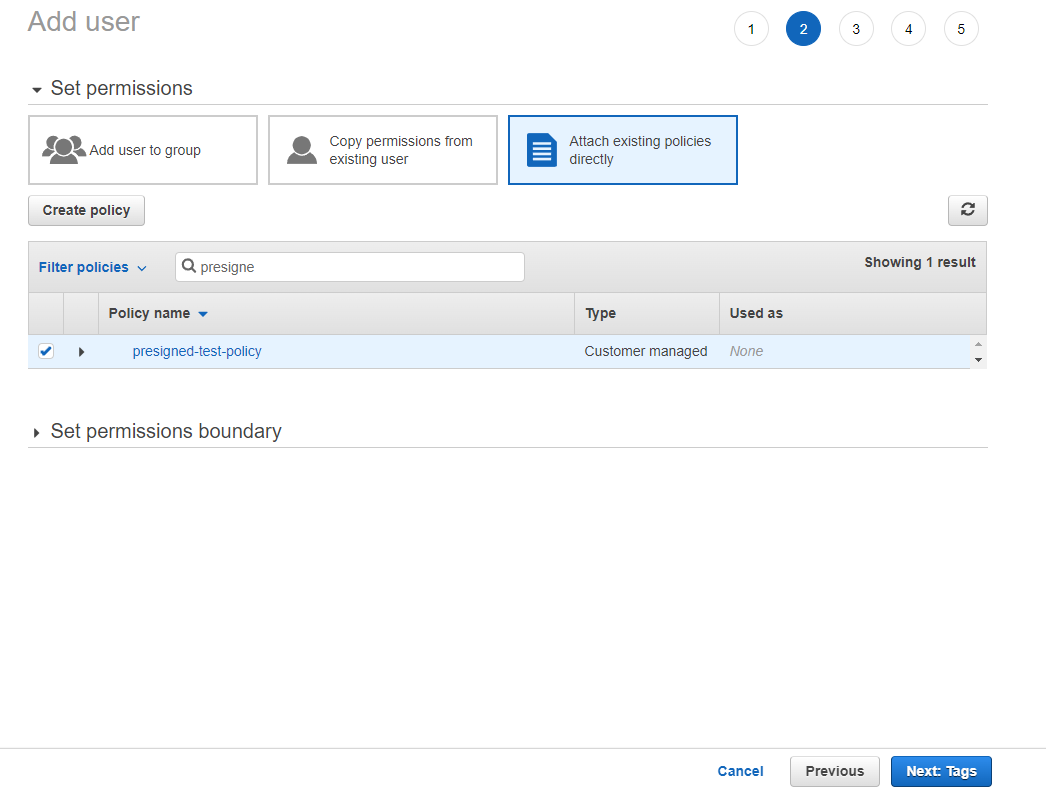
- For permissions, select “Attach existing policies directly”, find and select the policy we’ve created before, then click the “Next” button.
- Leave the other sections as default and create the user. After that, AWS shows “Access key ID” and “Secret access key”. The AWS access credentials must be noted for later use.
Creating Python module for Bucket processes
After creating S3 Bucket and IAM User, we can start programming our web application. The application will use the Python Flask library as the backend for serving data and JQuery for Ajax requests.
Firstly, we will create a lib.py file and insert a class that is responsible for downloading and uploading files to our AWS Bucket. We will use the Boto3, official AWS Python module (Boto3 Documentation).
# ----- lib.py -----
import json
import boto3
from botocore.client import Config

class AwsBucketApi:

    def __init__(self, bucket_name = None):
        settings = self.get_settings()
        self.bucket_name = bucket_name or settings.get("bucket_name")
        self.bucket  = boto3.client("s3",
            aws_access_key_id = settings.get("user_access_id"),
            aws_secret_access_key = settings.get("user_secret"),
            region_name = settings.get("bucket_region"),
            config = Config(signature_version='s3v4', s3 = {"addressing_style" : "path"})
        )

    def get_settings(self):
        with open("settings.json") as f:
            return json.load(f)
    ...
The code above has a class named AwsBucketApi and two functions in it. get_settings method reading settings.json file; getting AWS credentials, bucket name, and bucket region. The JSON file should be like that:
{
    "user_access_id" : "<aws-access-key-id>",
    "user_secret"    : "<aws-secret-access-key>",
    "bucket_name"    : "<bucket-name>",
    "bucket_region"  : "<bucket-region-name>"
}
The __init__ function creates the self.bucket object that indicates which AWS service and credentials we will use. In the following functions, we will use that object to connect S3 Bucket.
Presigned URL for getting file
# ----- lib.py -----
class AwsBucketApi:
    ...
    def generate_presigned_url(self, filename, expires = 3600):
        return self.bucket.generate_presigned_url(
            ClientMethod = "get_object",
            ExpiresIn = expires,
            Params = {
                "Bucket" : self.bucket_name,
                "Key" : filename
            }
        )
    ...
This method gets a filename (filenames are defined as “Key” on AWS) and returns a presigned URL string. We can show that URL to the user who we want to access the file. Normally all objects are private (we define that when creating the bucket), yet we will create a temporary public URL (the URL is time-limited, look at the expires) and anyone who has the URL can access data. As you can see in the .generate_presigned_url() function, we define bucket name and filename at the beginning, so if someone changes the signature of created URL, cannot reach any other bucket or objects.
Presigned URL for uploading file
# ----- lib.py -----
class AwsBucketApi:
    ...
    def generate_presigned_post_fields(self, path_prefix = "", expires = 3600):
        return self.bucket.generate_presigned_post(
            self.bucket_name,
            path_prefix + "${filename}",
            ExpiresIn = expires,
        )

    """
        RETURNS :
        {
            "fields": {...},
            "url": "https://s3.us-east-2.amazonaws.com/presigned-test"
        }
    """
    ...
Same as the presigned get URL, the method above will create a URL for public upload and some other fields. We will create a form and we will use the url value as action url, the fields values as hidden inputs. As before, we will grant users to upload files to the bucket who normally don’t have any permissions for that.
List and Delete Functions
# ----- lib.py -----
class AwsBucketApi:
    ...
    def get_files(self, path_prefix = ""):
        object_list = self.bucket.list_objects(
            Bucket = self.bucket_name,
            Prefix = path_prefix
        )

        if "Contents" not in object_list:
            return []

        return [{
                "url": self.generate_presigned_url(file.get("Key")),
                "filename" : file.get("Key")
            } for file in object_list.get("Contents")]

    def delete_file(self, filename):
        response = self.bucket.delete_object(
            Bucket = self.bucket_name,
            Key = filename
        )
        return response.get("DeleteMarker")
    ...
These methods are not relevant to the “presigned URL” concept, but it’d be better to have. Presigned URLs are used just for two actions: Upload file and get/download file. All other processes (like listing or deleting files) must be done at the backend and user permissions must be checked by the programmer. For example, with the delete_file method, if a user sends a filename that belongs to someone else, the method will delete the file; so before doing that, user permissions must be checked.
Creating Flask application
# ----- main.py -----
from flask import Flask, render_template, jsonify, request
from lib import AwsBucketApi

app      = Flask(__name__, static_folder="./statics", static_url_path="", template_folder="./templates")
bucket   = AwsBucketApi()
userpath = "user1/"

@app.route("/")
def homepage():
    post_fields = bucket.generate_presigned_post_fields(path_prefix=userpath)
    return render_template("index.html", data = {
        "post_fields" : post_fields
    })

@app.route("/get-images")
def get_images():
    # !IMPORTANT! : User access must be checked before get operation!
    # Users must only access their folders.
    return jsonify(bucket.get_files(userpath))

@app.route("/delete-image")
def delete_image():
    filename = request.args.get("filename")
    # !IMPORTANT! : User access must be checked before delete operation!
    return jsonify(bucket.delete_file(filename))

if __name__ == "__main__":
    app.run("0.0.0.0", 80, debug=True)
The Flask application basically has 3 endpoints:
/: Homepage. It returns theindex.htmlfile which has file upload form and user file list. (In this example we will only use image files.)/get-images: Ajax endpoint to get user files. It returns a dict object which includesfilenameand presigned geturl/delete-images: Ajax endpoint to delete file. It gets a filename and deletes the file.
Creating HTML page and AJAX endpoints
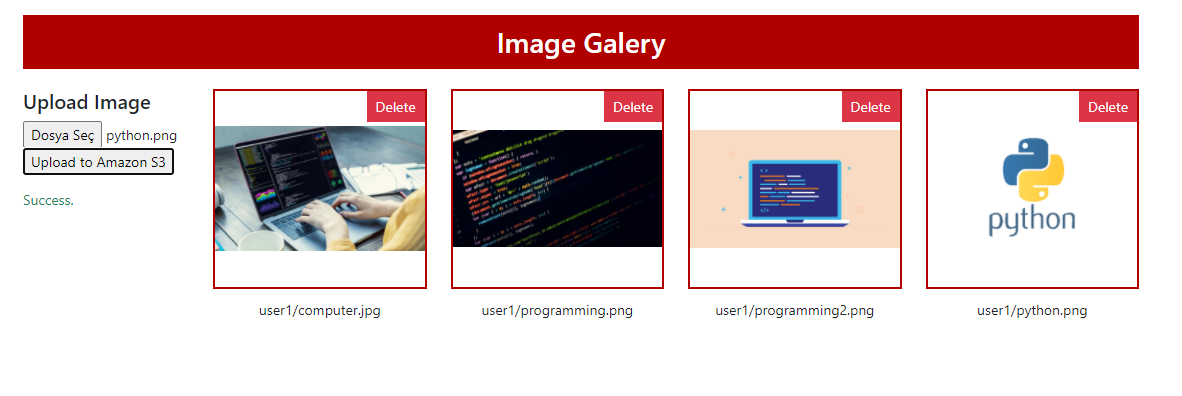
The last step is creating index.html file and using the methods above in that HTML page with Ajax methods. Full code is down below and has these sections:
-
section-1: This section has a form for uploading files. Thehomepage()method inmain.pyfile gets presigned post fields by usinggenerate_presigned_post_fields()method inlib.pyfile, and the method returns a dictionary that has presigned posturl(str) and signaturefields(dict). For creating the upload form; we should include thatfieldsas hidden inputs (keys are input name and values are input value) and useurlas action URL. -
section2: This is a basic image list section which is filled by ajax atsection-3. -
section-3: This ajax method sends a request to the/get-imagesendpoint and gets a list of dict which has presigned geturl(str) andfilename(str). If ajax is successful, it places the data in the table atsection-2. -
section-4: This ajax method serializes form data atsection-1and sends it to the presigned post URL which was created before and placed to theactionproperty of the form. -
section-5: This ajax method is responsible for deleting files.
<!----- index.html ----->
<html lang="en">
<head>
    <link href="https://cdn.jsdelivr.net/npm/[email protected]/dist/css/bootstrap.min.css" rel="stylesheet">
    <link href="style.css" rel="stylesheet">
    <script src="https://code.jquery.com/jquery-3.6.0.min.js"></script>
    <script src="https://cdn.jsdelivr.net/npm/[email protected]/dist/js/bootstrap.bundle.min.js"></script>
</head>
<body>
    <div class="container">
        <div class="row">

            <!-- HEADER -->
            <div class="col-md-12">
                <h3>Image Galery</h3>
            </div>

            <!-- UPLOAD FILE SECTION (section-1) -->
            <div class="col-md-2">
                <h5>Upload Image</h3>
                <form action="{{ data.post_fields.url }}" method="post" enctype="multipart/form-data">
                    {% for key, value in data.post_fields.fields.items() %}
                        <input type="hidden" name="{{ key }}" value="{{ value }}" />
                    {% endfor %}
                    <input type="file" name="file" />
                    <input type="submit" name="submit" value="Upload to Amazon S3" />
                </form>
                <div id="form-msg"></div>
            </div>

            <!-- SHOW IMAGES SECTION (section-2) -->
            <div class="col-md-10">
                <div class="row" id="image-wrapper"></div>
            </div>

        </div>
    </div>
    <script>

        // --- GET IMAGES and SHOW (section-3) --- //
        var get_images = () => {
            $.ajax({
                url: "/get-images",
                type: "GET",
                success: (data) => {
                    var wrapper = $("#image-wrapper");
                    wrapper.empty();
                    $.each(data, (idx, item) => {
                        wrapper.append(`
                            <div class="col-md-3">
                                <div class="img-wrapper">
                                    <img src="${item.url}">
                                    <button class="btn btn-danger btn-sm" data-filename="${item.filename}" onclick="delete_image($(this))">Delete</button>
                                </div>
                                <div>${item.filename}</div>
                            </div>`
                        )
                    })
                },
                error: (err) => {
                    console.log(err);
                }
            })
        }
        get_images();

        // --- UPLOAD IMAGES EVENT (section-4) --- //
        $("form").submit((e) => {
            e.preventDefault();

            var form_msg = $("#form-msg");
            var form_data = new FormData($('form')[0]);

            $.ajax({
                url: "{{ data.post_fields.url }}",
                type: "POST",
                data: form_data,
                processData: false,
                contentType: false,
                beforeSend: () => {
                    form_msg.html("<span class='text-warning'>Uploading...</span>");
                },
                success: (data) => {
                    console.log("success:", data);
                    form_msg.html("<span class='text-success'>Success.</span>")
                    get_images();
                },
                error: (err) => {
                    console.log("err:", err.responseXML)
                }
            })
        })

        // --- DELETE IMAGES EVENT (section-5) --- //
        var delete_image = (element) => {
            var filename = element.data("filename");
            $.ajax({
                url: "/delete-image",
                type: "GET",
                data: {"filename" : filename},
                success: (data) => {
                    console.log(data);
                    get_images();
                },
                error: (err) => {
                    console.log(err);
                }
            })
        }

    </script>
</body>
</html>
How can we make accessing Bucket objects more secure?
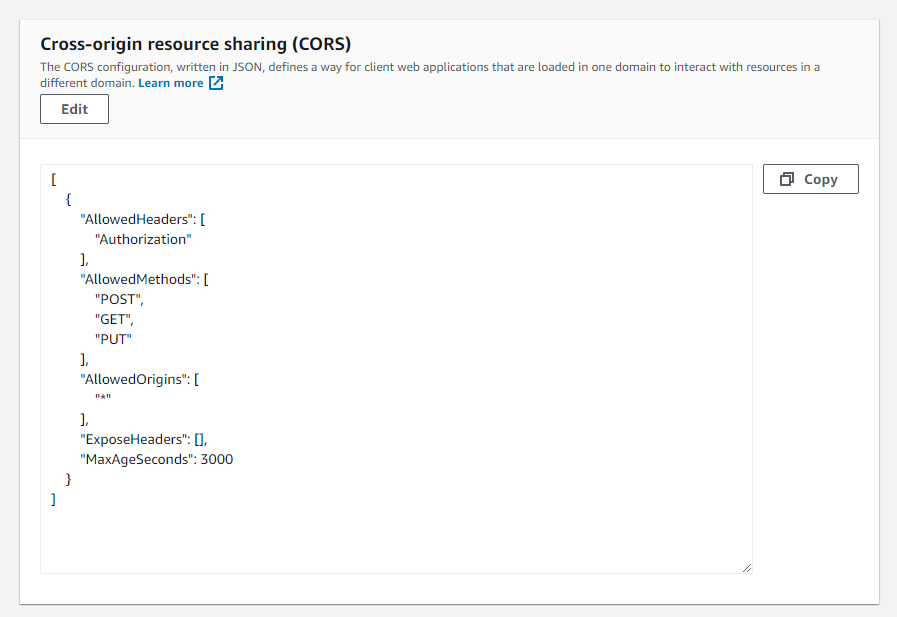
Cross-origin resource sharing (CORS)
AWS S3 has CORS (Cross-origin resource sharing) configuration support. CORS defines a way for client web applications that are loaded in one domain to interact with resources in a different domain. With S3 CORS configuration support, we can;
- identify the origins that we will allow to access our bucket
- specify HTTP methods to allow
- limit the post or get header keys
- define max-age in seconds for browsers can cache the response.
To add a CORS configuration to an S3 bucket,
- In the Buckets list, choose the name of the bucket that you want to create a bucket policy for.
- Choose Permissions.
- In the Cross-origin resource sharing (CORS) section, choose Edit.
- In the CORS configuration editor text box, type or copy and paste a new CORS configuration, or edit an existing configuration. The CORS configuration is a JSON file. The text that you type in the editor must be valid JSON.
- Choose Save changes.
Bucket policy
Bucket policy is another way to limit resources, actions and define conditions. For more information check out Policies and Permissions in Amazon S3